Guide to the Registry of Employers of International Agri-Food Workers
This is a step-by-step guide for employers on how to enter information into the registry.
Tips for working in the registry
- All information entered in the registry fields is saved automatically as it is entered.
- Required fields within the registry are outlined in red with the word “required” below the field. When information is entered into the field, the red outline and “required” disappear.
- Optional fields within the registry are not outlined in red when blank.
- In the top-right corner of the registry, there is an icon to flip between languages. When working in English it displays “FR.” When working in French it displays “EN.”
- At the bottom of the registry there is a “provide feedback” button which will allow you to contact the Agricultural Information Contact Centre via phone or email. We welcome all feedback about the registry as we work to make future enhancements.
- In the top-right corner of the registry beside the language icon, there is a menu icon. Selecting this icon will display a drop-down that allows you to navigate to the home page, contact the Agricultural Information Contact Centre, sign out or view the registry software version.
- In the top-right corner of the registry, there is an arrow icon. Selecting it will sign you out of the registry.
- In the top-left corner of the registry, there is an icon with the Ontario logo. Selecting that icon will direct you to the Ontario.ca home page.
Registry login
Start your registration process or update your information.
Create a new account
1. You must read and declare your consent to the Notice of Collection of Personal Information before you can select the “Sign in” or “Create account” buttons.
2. Select the “Create account” button. Enter your e-mail address and select “Send verification code.” This will send a verification code to your email which you will enter in the “Verification Code” field that is below the email field. Select the “Verify code” button.
3. Create a case sensitive password that is between 8 and 64 characters and containing at least 3 of the following: lowercase letter, uppercase letter, number and/or symbol.
4. Select the “Create” button to finish. You will be taken back to the home page where you check the box as in step 1. This time, select the “Sign in” button to access your newly created account.
Enter Business Information
5. On the Home page, select the “Create new” button to create a form to enter your Business Information. You should only have to enter this information once (unless you need to update it).
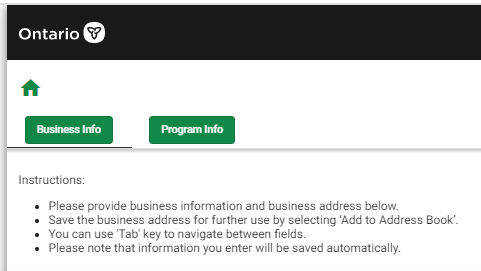
6. On the “Business Info” tab, you will need to enter information, including:
- legal name of the business
- Business Identification Number (BIN), this is your 9-digit Canada Revenue Agency number
- business address and mailing address (if different)
- contact name, phone number and email address
7. You can select collapsed sections to expand them (see the example of Business Address and Contact). There is also a “Minimize” button within each section to collapse it back to the minimized state.
Collapsed:

Expanded:
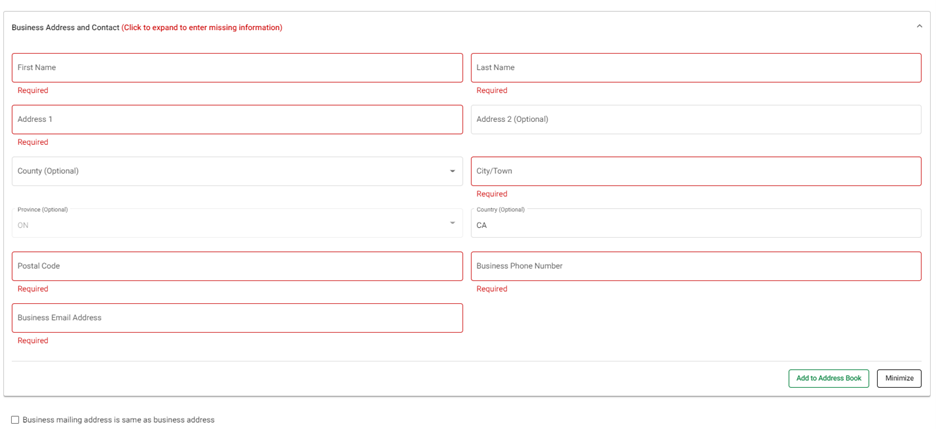
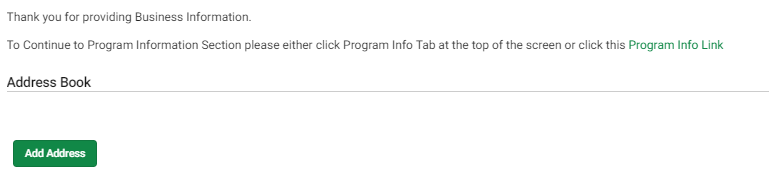
8. It is possible to save an address for use in other sections of the registry. To save an address to the “Address book,” select the “Add to Address Book” button at the bottom of any section where address information is collected.
9. Once you have completed all sections on the “Business Info” tab, you can move to the “Program Info” tab via the button at the top of the page or the link at the bottom.
Entering Program information for the year
10. The “Program Info” tab contains information that is expected to change each year. As such, its contents represent a single calendar year. You can add additional years.
11. The default is the current year. A different year can be selected by clicking on the “Year” button; this pulls out a left sidebar with all years created to date. There is a “+” button next to the word “Year.” Selecting this will bring up a list of available years to add. When you select a year of interest, you will be able to edit a new record for that year.
12. There are three separate sections on this tab:
- Program
- Work Location
- Accommodation
Program
13. For the workers you expect to hire throughout the calendar year, select the program stream from the drop-down menu.
14. Enter the country of origin. Note that the country of origin is only required if you are hiring 10 or more workers across all streams. If you start typing the country name, you can select the display or select enter to save the entry. If multiple options are available, you can use arrow keys to move between the options before entering or selecting the desired option. Make sure the full country name is entered.
15. Enter the arrival and departure months as per your approved Labour Market Impact Assessment (LMIA), where possible.
16. If you use multiple program streams or workers from different countries or arrival or departure months, select the “Add Program” button to add additional combinations of program, country of origin and arrival/departure date.
Work location
17. Enter any and all locations that IAWs may work throughout their work term.
18. Use the “Location Name” field to identify and distinguish between different addresses (for example, greenhouse #1 or farm 2).
19. There are two options to “Pick from Address Book” to use an existing/saved address:
- select the button at the top of the expanded section and auto-fill the existing record with a saved address
- select the button below the expanded (or collapsed) section and create a new record that is completed with the saved address
20. Use the “Add a Work Location” button to create a blank record to populate the information for any additional locations.
Accommodation
21. Select the “Add Accommodation” button to create a new location for housing or select the “Pick from Address Book” button to use a saved address.
22. As with Work Location, the “Pick from Address Book” at the top of the expanded section acts to auto-fill that record with the saved address.
23. Use the location name field to identify/distinguish between different addresses (for example, bunkhouse #1, farmhouse 1).
24. Provide the number of all individual housing/building structures in this location. One location may have more than one housing/building structure such as multiple trailers or, bunkhouses. Select the type of accommodation/housing from the drop-down list and then provide the total number of workers across all individual housing structures.
25. If there are multiple types of structures (for example, trailer and single-family dwelling) you can create additional records at the same address with the number of structures and total capacity of each type being entered in the record corresponding to that housing structure.
Exit the registry
26. Once you’ve filled out the business and program information, review your entries to ensure all required fields are completed and that there are no sections highlighted in red stating the presence of missing information.
27. You can sign out using the arrow icon in the top right corner or by using the drop-down menu. You can also navigate away from the registry and your session will time out.
Return to the registry
When you return to the registry to enter additional information, you can either:
- use the links on the home page to access the “Business Info” tab
- select the relevant year to access the “Program Info” tab including the program, work location and accommodation location
The “Add a year" button will allow the create of a record for next year.
Contact us
For more information about the Registry of Employers of International Agri-Food Workers, contact the Agriculture Information Contact Centre by:
- phone at
1-877-424-1300 , Monday to Friday, 8:30 a.m. to 5:00 p.m. - email at ag.info.omafra@ontario.ca