Daily inspection test
Introduction and overview
The purpose of the daily inspection test is to determine if you have the knowledge and skills required for the safe operation of the vehicle and to identify any of the prescribed minor or major defects as listed in the applicable schedule(s) in the Ontario Regulation O. Reg. 199/07.
The daily inspection test is divided into the following sections and will be performed in the following order:
- Exterior inspection
- In-cab check
- Interior inspection
The exterior and interior portions of the daily inspection test will be administered using a random selection of testing items from schedule 1 in Regulation O. Reg. 199/07. This will ensure that you are prepared to inspect all components of the vehicle.
You will be required to inspect all items listed for the in-cab portion of the test. You will be permitted to use Schedule 1 as a guide and reference during the daily inspection test.
Exterior inspection
The exterior inspection of the vehicle must be performed with the parking brake engaged (for all Class A vehicles and vehicles equipped with air brakes, unless when necessary to release the parking brake during the course of the inspection) and the wheels chocked.
You will be asked to find and inspect four randomly generated items from the list below and be required to:
- demonstrate and describe how you would inspect the particular item
- explain what the defect(s) would be for the particular item
- describe what action you would take upon identifying a minor and/or major defect
For all full Class A road tests and any road test where the vehicle is equipped with air brakes, you must be prepared to inspect any of the air brake components of the vehicle listed below, as well as any of the other items. The list also provides inspection methods for each item.
Slow air pressure build-up rate
You must know the proper method for testing the air pressure build-up rate, and that a vehicle has this minor defect when it takes longer than two minutes for air pressure to build up from 85 to 100 psi.
Procedure:
- Ensure the trailer supply valve is closed (pulled out when equipped)
- Pump brakes to reduce air pressure to 552 kPa (80 psi or less)
- Maintain engine speed of 600 to 900 RPM
- Note time for pressure to rise from 587 to 690 kPa (85 to 100 psi) while maintaining specified engine speed
- Note the build-up time and tell the examiner
Audible air leaks
You must know that it’s necessary to check for leaks regularly, and a vehicle has this minor defect when any air leak can be heard.
Air loss rate exceeds the prescribed limit
You must know the proper method for testing the air-loss rate, and that a vehicle has this major defect when the air pressure drops in one minute more than the prescribed limit of :
- 28 kPa (4 psi) in one minute for Class A
- 21 kPa (3 psi) in one minute for Class D
Procedure:
- Tell the examiner, “For any air leaks heard at any time, I would conduct the air-loss rate test.”
- Ensure the vehicle is secured by wheel chocks
- Release all spring parking/ emergency brakes
- Ensure the air-system pressure is between cut-in and cut-out values (80-145 psi); shut off the engine and turn the key on (if required)
- Hold the brake pedal in the fully applied position
- Observe the air pressure gauges for one minute and note any change. (Disregard the initial pressure drop and begin test after the pressure has stabilized.)
Pushrod stroke of any brake exceeds the adjustment limit
You must know the proper method for checking brake pushrod stroke, and that a vehicle has this major defect when the pushrod stroke of any brake is longer than the prescribed limit.
Certain vehicles do not provide access to measure the applied pushrod stroke (buses, low-slung vehicles and those with obstructive fairing or body panels, or vehicles equipped with air disk brakes). In such cases, the examination is conducted verbally.
Here are the steps you must take to measure applied pushrod stroke.
- Secure the vehicle with wheel chocks or blocks
- Ensure air pressure is above 621 kPa (90 psi) and release the spring brakes
- Select one of the following methods :
- Method 1 : Mark the pushrod at the brake chamber or at a suitable fixed reference point. (Use chalk, soapstone, marker or other similar instrument. Marks must be narrow and precise.)
- Method 2 : Measure the released position of the pushrod. (Measure and note the distance from a point on the pushrod to a suitable fixed point at the brake chamber. This is measurement number 1.)
- Raise or lower the air pressure by running the engine or pumping the brake pedal until both the primary and secondary air-tank gauges display 621 to 690 kPa (90 to 100 psi)
- Shut off the engine
- Press and hold the brake pedal in the fully applied position, and use a suitable means to hold the brakes applied in order to leave the cab and inspect them
- Determine the applied pushrod stroke. (Continue to use the previously selected method.)
- Method 1 : Measure the distance from the brake chamber or fixed reference point to the mark on the pushrod
- Method 2 : Measure the applied position of the pushrod. (Re-measure and note the distance from the previously selected point on the pushrod to the previously selected fixed point at the brake chamber. This is measurement number 2.) Subtract measurement 1 from measurement 2 to calculate the applied pushrod stroke measurement
- Determine the number size (such as 16, 20, 24 or 30) and type (such as standard or long-stroke) of the brake chamber
- Determine the adjustment limit for the brake chamber
- Compare the applied pushrod stroke to the applicable adjustment limit and identify any brake that exceeds the adjustment limit as defective
Inoperative towing vehicle (tractor) protection valve
You must know the proper method for testing the tractor (towing vehicle) protections system, and that a vehicle has this major defect when air escapes from the service line during service-brake application, when the trailer supply valve is closed.
Procedure:
- Ensure air pressure is within its normal operating pressure range, cut-in and cut-out values (80 -135 psi)
- Ensure the trailer supply valve is closed (pulled out)
- Remove the trailer service-line coupler (glad-hand) from the trailer or its storage location, and place it where it can be observed
- Apply service brakes.
Note: If you are concerned that the vehicle has no anti-compounding valve, you must ensure the vehicle is secure and release the spring (parking/ emergency) brakes before applying the service brakes - Observe if any air is exhausting from the trailer service-line coupler (glad-hand)
Low-air warning system fails or system is activated
You must know the proper method for testing the low-air warning, and that a vehicle has this major defect when the low-air warning fails to activate or activates before air pressure drops below 55 psi.
Procedure:
- Ensure air pressure is above 621 kPa (90 psi). If air pressure is too low, warning may activate as soon as ignition key is turned on
- Ensure ignition key is turned on. Engine may be running or shut off. (If ignition key is not turned on, the warning will not activate.)
- Press and release the brake pedal (to lower pressure) several times until warning activates
- Watch the pressure gauges and note the pressure when the low-air warning device activates. (Low-air warning device may only be a light, or a light and an audible device.)
Occupant compartment door fails to open
You must know that the occupant, driver and passenger doors must be able to open in an emergency, and that a vehicle has this minor defect when any door meant for someone to enter or exit the cab fails to open.
Any cab or sleeper door fails to close securely
You must know that the driver, passenger or occupant door must remain securely closed when a vehicle is moving, and that a vehicle has this major defect when any door meant for someone to enter or exit the cab fails to close securely.
Procedure:
- Test the function of the selected door to ensure the door opens properly and closes securely
Coupler or mounting has loose or missing fastener
You must know that the condition of couplers and the mounting structure need to be inspected visually, and that a vehicle has this minor defect when any coupler or the mounting structure that supports a coupler has a fastener that is loose or missing.
Procedure:
- Physically check and verbally describe the coupler assembly (for example, fifth wheel or pintle hook) and the related mounting fasteners
- Point and check for loose and missing fasteners
- Point out the fasteners to the examiner
Coupler is insecure or movement exceeds prescribed limit
You must know the symptoms of couplers that are loose or are developing abnormal amounts of movement, methods for measuring the amount of movement or having it measured, and that a vehicle has this major defect when :
- Movement between the upper and lower coupler of a fifth wheel is more than 1/2 in. (13 mm) in the forward/rearward direction
- Movement between the pintle hook and a drawbar eye is more than 3/8 in. (10 mm) in the forward/rearward direction
Procedure:
- Position yourself to be able to see the coupler assembly and the related mounting structure and attachments
- Visually check for evidence of damaged, broken, cracked, loose or missing components
- State what is being checked
- Apply trailer brakes and release tractor brakes
- Verbally state when in or after coupling, “I will feel for excessive play/movement.”
- Verbally describe the process to check and measure coupler movement: tractor trailer combination only
- Apply trailer brakes and, using the power train, gently pull tractor as far forward as possible
- Mark the fifth wheel with chalk or similar marking
- Use the power train to move the tractor rearward against the trailer as far as possible
- Observe the distance between the markings placed on the fifth wheel and confirm it is less than 1/2 in. (13 mm) for fifth wheel or 3/8 in. (10 mm) for pintle hook
Coupling or locking mechanism is damaged or fails to lock
You must know the importance of having couplers properly locked, the locking methods used by couplers, how to visually inspect these locks, and also know that a vehicle has this major defect when any coupler or lock is damaged or isn’t properly locked.
Procedure:
Fifth-wheel couplers:
- Position yourself to be able to see the coupler assembly
- Visually verify the position of the fifth-wheel release handle
- Visually check the position of any exposed mechanism on the fifth wheel
- Describe the following procedure. Get under the trailer at the rear of the tractor and visually inspect the position of the fifth-wheel locking jaws
Pintle-hook couplers:
- Position yourself to be able to see the coupler assembly
- Visually check the position and condition of the latching and locking mechanism
Defective, incorrect or missing safety chain/cable
You must know the importance of safety chains and cables, the type that must be used, as well as the condition they need to be in, and that a vehicle has this major defect when a safety chain or cable is missing, is the wrong type or size, or is noticeably damaged or worn out.
Procedure:
- Inspect the safety chain(s) to ensure they are hooked and crossed (when two chains), and hooks are secured with a secondary hook
Exhaust system
Exhaust leak
You must know how to visually inspect the exhaust system, and that a vehicle has this minor defect when there’s a noticeable exhaust leak.
Exhaust leak that causes exhaust gas to enter the occupant compartment
You must know the hazard of prolonged exposure to engine exhaust gases, and that the vehicle has this major defect when exhaust gases from an exhaust-system leak are getting into the cab.
Procedure:
- With the vehicle running, open the hood or other compartments as required, and inspect the complete exhaust system to ensure there are no signs of exhaust leaks
Damaged frame or cargo body
You must know that the condition of the vehicle and any cargo body frame need to be inspected visually, and that a vehicle has this minor defect when there’s any noticeable or suspected damage such as a cracked, bent or deformed part or section in the frame or cargo body.
Visibly shifted, cracked, collapsing or sagging frame member(s)
You must know that the condition of the vehicle and any cargo body frame need to be inspected visually, and that a vehicle has this major defect when there’s any noticeable or suspected damage such as a cracked, bent or deformed part or section in the frame or cargo body.
Procedure:
- Inspect one side of the vehicle and open hood to check for any noticeable or suspected damage such as a cracked, bent or deformed part or section in the frame or cargo body, or any frame component has shifted, is cracked, collapsing or sagging
Fuel systems
Missing fuel tank cap
You must know the hazards of fuel spillage and fuel contamination, and that a vehicle has this minor defect when the fuel-tank cap is missing.
Insecure fuel tank
You must know that fuel tanks must be securely attached to a vehicle and how to visually inspect fuel-tank security, and that a vehicle has this major defect when a fuel tank isn’t securely mounted or otherwise attached to the vehicle.
Dripping fuel leak
You must know the hazards of fuel that is flammable and an environmental hazard, and that a vehicle has this major defect when there is fuel dripping anywhere from it.
Procedure:
Visually inspect to ensure:
- Fuel cap(s) are not missing
- Fuel tank(s) are secure; where accessible, inspect straps to ensure they are attached (not required to grab or shake fuel tank or straps)
- Fuel is not leaking from the fuel tank(s) or dripping from anywhere from the vehicle including under engine compartment and fuel tanks
Glass and mirrors
Required mirror or glass has broken or damaged attachments onto vehicle body
You must know that the windows and mirrors that are necessary for safe operation must also be securely attached to vehicle, and that the vehicle has this minor defect when the attachments for any required mirror or other glass are broken or damaged.
Procedure:
- Inspect the vehicle to ensure all external mirrors and mirror attachments onto the vehicle body are secure, not broken or damaged
Hydraulic brake system
Brake fluid level is below indicated minimum level and brake fluid reservoir is less than one-quarter full
You must know the location of the hydraulic brake master-cylinder reservoir, how to check the level of the brake fluid, and that the vehicle has this minor defect when the brake fluid level is below the mark indicating the minimum level as determined by the manufacturer, or a major defect when the reservoir is less than one-quarter full.
Brake fluid leak
You must know that brake fluid is required for the system to operate, that loss of brake fluid can cause the brakes to malfunction or fail completely, and that a vehicle has this major defect when a brake fluid leak is noticeable.
Procedure:
Open the hood and inspect brake-fluid reservoirs to ensure:
- Brake fluid is above the minimum required level
- There is no brake-fluid leak
- Brake-fluid reservoir is not less than one-quarter full
Suspension system
Air leak in air-suspension system
You must know that a vehicle has a minor defect when an air leak is noticeable in the air-suspension system.
Damaged (patched, cut, bruised, cracked to braid or deflated) air bag
You must know the normal appearance of air bags used in vehicle suspension systems, be able to recognize the signs of damage and identify when the damage may also cause an air bag to be deflated. You must also know a vehicle has a major defect when any air bag is damaged and has no air in it.
Procedure:
- Inspect the vehicle (or describe the process) to ensure an air leak is not noticeable in the air-suspension system and any air bag is not damaged and has air in it
Broken leaf spring
You must know the importance of doing a visual inspection of leaf springs and how to identify a broken leaf spring, and that the vehicle has this minor defect when any spring has a single broken leaf.
Cracked or broken main spring leaf or more than one broken leaf spring
You must know which leaves in a spring are considered to be “main” leaves, and that a vehicle has this major defect when either a main leaf or more than one other leaf is broken.
Part of leaf spring or suspension is missing, shifted out of place, in contact with another vehicle component
You must know the condition of the suspension-system components, and the hardware that attaches it to the vehicle need to be inspected visually; you must be able to recognize the signs of more serious unsafe suspension-system conditions, and that a vehicle has this major defect when any part of a leaf spring or suspension part is missing, has shifted out of place or is in contact with another vehicle component.
Procedure:
- Inspect the vehicle (or describe the process where not accessible) to identify any cracked or broken spring leaves, or a spring leaf or suspension part is missing, has shifted out of place or is in contact with another vehicle component
Suspension fastener is loose, missing or broken
You must know the condition of the suspension-system components and the hardware that attaches it to the vehicle need to be inspected visually; you must be able to recognize the signs of loose, missing or broken components, and also know that a vehicle has this minor defect when any suspension fastener is loose, missing or broken.
Loose U-bolt
You must know how to locate and identify suspension U-bolts, know the importance of ensuring they remain tight, as well as the signs of loose U-bolts. You must also know that a vehicle has this major defect when any spring U-bolt is loose.
Procedure:
- Inspect the condition of the suspension-system components and the hardware, including suspension fasteners and U-bolts, that attaches it to the vehicle for any visual signs of loose, missing or broken components
Tires
Leaks
Tire leaking, if leak cannot be heard
You must know the importance of keeping tires properly inflated, appreciate the need to regularly check for leaks, and that a vehicle has this minor defect when a leak appears evident, but cannot be felt or heard in any tire.
Tire flat, if leak can be felt or heard
You must know the dangers of operating with a flat tire, and that a vehicle has this major defect when any tire is flat, or when a leak can be felt or heard.
Procedure:
- Select one tire of the vehicle and inspect tire for any leaks (listen and feel).
Note: Kicking the tires or using a mallet to check for flats is acceptable
Damaged tread or sidewall of tire
You must be able to distinguish between the tread and sidewall of a tire, recognizing the visual signs of damage to them, and know that a vehicle has this minor defect when there is damage to the tread or sidewall area.
Tire-tread depth is less than wear limit
You must know how to check tire-tread depth and the minimum allowable depth for various tire positions in vehicle safety regulations, and that a vehicle has this major defect when any tire’s tread depth is below the allowable wear limit.
Tire is in contact with another tire or any vehicle component other than mud flap
You must know that tires should never contact other vehicle components, and while a tire contacting a mud flap is not a safety concern, that a vehicle has this major defect when any tire is in contact with another tire or any other vehicle component.
Tire has exposed cords in the tread or outer sidewall area
You must know that tires are constructed with steel cords inside their casings, which are covered in rubber for protection, and that a vehicle has this major defect when cords are exposed in the tread or sidewall of any tire.
Procedure:
Select one tire of the vehicle and inspect it for :
- Damaged tread or sidewall of tire – (any visual signs such as cuts or other damage to treads and sidewalls)
- Tire tread depth – to ensure the depth is greater than the minimum allowable depth for the tire positions in vehicle safety regulations (3 mm steer tire and 1.5 mm for other tires)
- Contact with another tire or any vehicle component other than mud flap – to ensure there is no contact
- Exposed cords in the tread or outer sidewall area – to ensure there are no exposed cords in the tread or sidewall of any tire
Wheels, hubs and fasteners
Hub oil below minimum level (when fitted with sight glass)
You must know that wheel hubs use bearings that require lubrication, that oil is often used as a bearing lubricant, that hub caps used with oil-lubricated bearings may have a clear window allowing a visual inspection of the oil fill level, and that a vehicle has this minor defect when you can see that the hub-oil level is below minimum.
Leaking wheel seal
You must know that wheel hubs require seals to keep the lubricant inside the hub; when a wheel seal is leaking, the wheel bearing can fail, and that a vehicle has this minor defect when there is evidence of a leaking wheel seal.
Evidence of imminent wheel, hub or bearing failure
You must know the normal appearance of wheel and hub components, the visual indications of more serious unsafe conditions, and that a vehicle has this major defect when there is visual evidence that a wheel, hub or bearing failure could occur.
Procedure:
- Where sight glass is present (or describe procedure if not present), inspect the hub-oil level to ensure oil is above the minimum level
- Inspect to ensure there is no evidence of a leaking wheel seal – look inside the wheel for oil and stains
- Inspect to ensure there is no visual evidence that a wheel, hub or bearing failure could occur
Wheel has loose, missing or ineffective fastener
You must know : the visual features of different types of wheel systems; the importance of keeping wheel fasteners (normally nuts and bolts) properly tightened; be able to detect missing fasteners and recognize the visual signs of loose or ineffective fasteners; and know that a vehicle has this major defect when any wheel has a loose, missing or ineffective fastener.
Evidence of imminent wheel, hub or bearing failure
You must know the normal appearance of wheel and hub components and the visual indications of more serious unsafe conditions, and that a vehicle has this major defect when there is visual evidence that a wheel, hub or bearing failure could occur.
Procedure:
- Inspect for any missing fasteners and recognize the visual signs of loose or ineffective fasteners such as a gap between nut and wheel
- Inspect to ensure there is no visual evidence that a wheel, hub or bearing failure could occur
Damaged, cracked or broken wheel, rim, attaching part
You must know the visual features of different types of wheel systems, the normal appearance of the individual components, and that a vehicle has this major defect when any wheel, rim, or any part used to attach the wheel or rim, is damaged, cracked or broken.
Evidence of imminent wheel, hub or bearing failure
You must know the normal appearance of wheel and hub components, and the visual indications of more serious unsafe conditions, and that a vehicle has this major defect when there is visual evidence that a wheel, hub or bearing failure could occur.
Procedure:
Open hood if access will improve visibility and inspect inner-and-outer wheel assembly to ensure :
- Any wheel, rim, or any part used to attach the wheel or rim, is not damaged, cracked or broken
- There is no visual evidence that a wheel, hub or bearing failure could occur
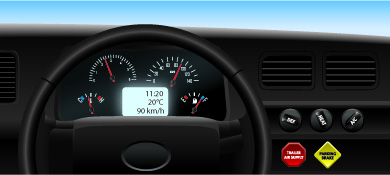
In-cab check
Once the exterior inspection is complete, you will enter the vehicle and begin the In-cab check portion of the test, where you must point to or touch all items and fully explain what you are inspecting for each item. You are not required to list the minor or major defects.
During the In-cab check portion of the test, you will be expected to start the vehicle and perform the following checks:
| Item | Check to perform |
|---|---|
| All the gauges | Confirm and indicate that all gauges and indicators are normal and working properly. |
| Air pressure gauge (air brake vehicle only) | Confirm and indicate air pressure gauge is working properly and is within normal operating range. |
| Driver’s seat and seat belt | Confirm the driver seat is secure and seat belts are secure, and in good working condition. |
| Mirror and windshield | Check the windshield and confirm it is clear and has no obstructions or damage to the glass. Confirm the mirrors are properly adjusted. |
| Heater/ Defroster controls | Confirm the heater(s) and defroster(s) work in all positions. |
| Steering wheel | Confirm the steering wheel is securely attached to the vehicle, responds in the normal way and there is no excessive free play. |
| Wipers and washers | Confirm the windshield wipers and washer fluid are working normally. |
Interior inspection
Once the In-cab check is complete, you will find and inspect two randomly generated items from Schedule 1 and be required to:
- Demonstrate and describe how you would inspect the particular item
- Explain what the defect(s) would be for the particular item
- Describe what action you would take upon identifying a minor and/or major defect
Driver seat
Seat is damaged or fails to remain in set position
You must know that the driver seat has to be properly positioned to be able to control the vehicle, know the methods for confirming the seating positions, as well as the locking methods, and that the vehicle has this minor defect when the seat is damaged or won’t stay in the position needed to drive.
Seat belt or tether belt is insecure, missing or malfunctions
You must know the importance of seat belts, how to properly wear them and the condition they must be in to function properly. You must know that a vehicle has this major defect when any seat belt or tether belt is insecure, missing or malfunctions.
Procedure:
Inspect:
- Driver seat to ensure it is not damaged and will stay in the position needed to drive
- Seat belt to ensure tether belt is secure and works correctly clipped and unclipped
Emergency equipment and safety devices
Emergency equipment is missing, damaged or defective
You must know what emergency equipment is required for the type of transport you are involved in, how to check it, and that a vehicle has this minor defect when any necessary emergency equipment is missing, damaged or doesn’t work properly.
Procedure:
- Verbally identify where the emergency flares, lamp or reflectors are located and that they are working properly and secure
Heater / defroster
Control or system failure
You must know the importance of the heater/defroster always being available for keeping the windshield clear of condensation, and that a vehicle has this minor defect when the heater/defroster system operates incorrectly.
Procedure:
- Turn on heater/defroster fan for all directional controls/ positions and ensure the system operates correctly in all positions
- When applicable, ensure the defroster keeps the windshield clear
Glass and mirrors
Required mirror or window glass fails to provide the required view to the driver as a result of being cracked, broken, damaged, missing or maladjusted
You must know the importance of always having a clear view of the conditions around the vehicle, the windows and mirrors that are required on the vehicle, and that a vehicle has this minor defect when there’s mirror- or window-glass damage that reduces this needed visibility.
Procedure:
- Inspect mirrors and windows for any cracks or damage that reduce the required view to the driver, and ensure mirrors are properly adjusted
Windshield wiper / washer
Control or system malfunction
You must know how to operate the windshield wipers and washers, that periodic testing is required to ensure they are available at all times, and that a vehicle has this minor defect when the control or any part of the system fails to function properly.
Wiper blade damaged, missing or fails to adequately clear driver’s field of vision
You must know the normal condition and function of wiper blades, and be able to recognize when they no longer function well, and that a vehicle has this minor defect when a wiper blade is damaged or missing, or when it won’t clear the area of the windshield in front of the driver.
When use of wipers or washer is required -- wiper or washer fails to adequately clear driver’s field of vision in area swept by driver’s-side wiper
You must know that being able to see the roadway clearly in poor weather is very important, that this visibility is dependent upon the wipers being able to clear water, snow and ice from the windshield, and that a vehicle has this major defect when the prevailing weather conditions require use of the wipers or washers, and they are not able to keep clear the area swept by the driver’s side wiper.
Procedure:
Inspect vehicle to ensure:
- The windshield wipers and washers function properly in all directions
- Any wiper blade is not damaged or missing, and will clear the windshield